An SEA system has many components. Assembling a complete system requires choosing from options in each of these catagories: Download PDF File
- Number of Channels
- Driver Electronics
- Displacement Sensor Drivers
- Optional Temperature Sensor and Index/Encoder Driver
- Optional Meter Module
- Displacement Sensor Probes
- Probe Mount Hardware
- Master Target Hardware
- SEA Software
Each of these categories and the available options are shown below.
Number of Channels
Three or five channels of displacement measurement.
Five channel systems can do comprehensive testing in all axes simultaneously including Tilt Measurements.
Three channel systems must be physically reconfigured to make Tilt Measurements and then can only make the measurement in one axis at a time.
Driver Electronics
Elite Series electronics feature a modular design and the high-resolution performance required to measure precision spindles. In addition to the capacitive displacement sensor electronics, modules are also available for temperature sensors, encoder/index input processing, and a meter/display module.
Displacement Sensor Drivers
Two options are available for the displacement sensors. One driver is required for each channel of displacement measurement. The drivers will be calibrated with the selected probes for a particular measurement range (sensitivity).
CPL190 Single Sensitivity Driver: One calibration for general use.

CPL290 Dual-Sensitivity Driver: Two selectable calibrations allow this system to measure spindles of varying performance levels. A high-sensitivty (short range, high resolution) is selectable for extremely high performing spindles allowing sub-nanometer measurements.

Optional Temperature Sensor and Index/Encoder Driver
Thermal spindle tests (ETVE, Thermal Stability) are required by international standards.
TMP190 Temperature and Index/Encoder Module
Temperature is the primary factor in machining errors. Measuring the machine’s ability to reliably place the tool in the correct position relative to the workpiece is indispensible informative. This module can use up to seven “button” style magnetic-mount temperature sensors to monitor temperatures at different points on the machine.
Index and/or Encoder inputs from the spindle is the ideal way to control the spindle measurement data acquisition system. This module conditions those signals and connects them to the SEA system.

Optional Meter Module
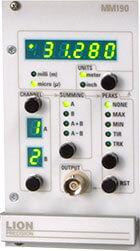
MM190 Meter Module
A meter module that displays in metric or inch units. Includes peak capture functions and channel summing.
Electronics Enclosure
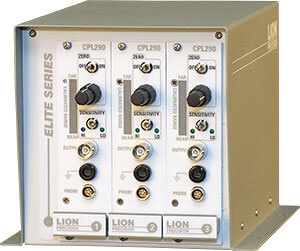
The number of modules selected will determine which Elite Series enclosure will be used. The Data Acquisition device is installed directly on the six- and eight-slot enclosures; it is a separate desktop device with the three-slot enclosure.
Three-Slot Enclosure
Basic three-channel systems.
- 3 CPL190 or CPL290 (shown)
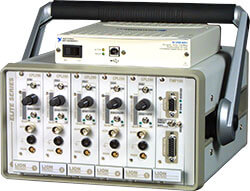
Six-Slot Enclosure
Enclosure with tip-up handle. For five channel systems or three-channel systems with Temperature or Meter module.
- 3 CPL190 or CPL290, 1 TMP190
- 3 CPL190 or CPL290, 1 MM190
- 5 CPL190 or CPL290
- 5 CPL190 or CPL290, 1 TMP190 (shown)
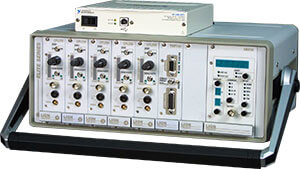
Eight-Slot Enclosure
Enclosure with tip-up handle. For five channel systems with Temperature and/or Meter modules.
- 5 CPL190 or CPL290, 1 TMP190
- 5 CPL190 or CPL290, 1 MM190
- 5 CPL190 or CPL290, 1 TMP190, 1 MM190 (shown)
Displacement Sensor Probes
Standard systems use an 8 mm probe in each axis. Three measurement ranges are available for the this probe as listed below. For greatest versatility, use the CPL290 Driver and have two of the three measurement ranges availableon the system.
Smaller probes and probe nests are available for micro-maching or otherwise small spindle measurement.
|
Probe Options |
Calibrations |
Mount Hardware |
Master Target |
| C8-2.0 | Standard: 250 µm Fine: 50 µm Ultrafine: 10 µm |
Standard 3- or 5-Probe Nest | Dual or Single Ball, 1″ |
Probe Mount Hardware
Accuracy of the measurements are dependent on stiffness and reliability of the mounting hardware. Precision probe holders are designed to maintain precise perpendicularity required for accurate measurement of high-resolution error motion.
Also available are more generic adjustable probe holders for single channel measurements and smaller probe nests for smaller diameter probes..
Probe nests are manufactured from 416 SST hardened to Rc 40
Master Ball Targets and Probe Nests Dimensions and Care
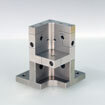 3 Probe Nest
X, Y, and Z axes measurements with a three channel system.
5 Probe Nest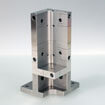
2X, 2Y, and Z measurements for tilt and error motion with 5‑channel systems.
Turning Center Adaptor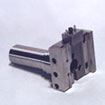
Fits in turning center tool holder and holds a standard three probe nest.
Adjustable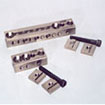
For mounting probes where standard probe nests can not be used.
XYZ Positioning Stage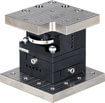
For use with 3- and 5-Probe Nest when fine positioning of the target/spindle is not available.
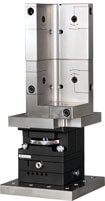
Shown with Standard 5-Probe Nest
Master Ball Target Hardware
Master targets are manufactured to exacting standards. Our master ball targets boast a roundness of better than 50 nm (2 µinch).
If not using an encoder/index output from the spindle to determine angular location, targets require some eccentricity for the software to establish a “once-around” signal. Some master balls have fixed 50 µm eccentricity. Master balls are also available with adjustable eccentricity for high precision spindles in which 50 µm eccentricity is too much. A dual master ball is required for five channel systems.
A precision 1 inch gage pin with two finished surfaces and other specialty targets are available as required.
Master Ball Targets and Probe Nests Dimensions and Care
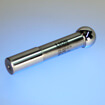 Single 1″50 µm Eccentricity
One precision ball for three channel systems. Not for Micro or Nano systems
Dual 1″50 µm Eccentricity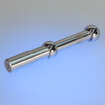
Two precision balls for five channel systems enabling measurements of tilt as well as other error motions. Not for Micro or Nano systems
Single 0.5″Adjustable Eccentricity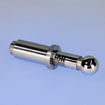
One precision 0.5″ ball for three channel systems on smaller and micromachining machine tools. Not for Nano systems.
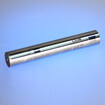 Precision Pin 20 mm No Eccentricity
Two finished target areas. Not for Micro or Nano systems
Single 1″ Adjustable Eccentricity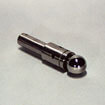
One precision ball for three channel systems. Not for Micro or Nano systems
Dual 1″ Adjustable Eccentricity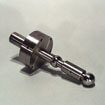
Two precision balls for five channel systems enabling measurements of tilt as well as other error motions. Not for Micro or Nano systems
